
This month’s maker is Neal Mukherjee, MS2 with the UCSF School of Medicine. We caught up with Neal to see what they have been making with the Makers Lab.
Q: What did you create?
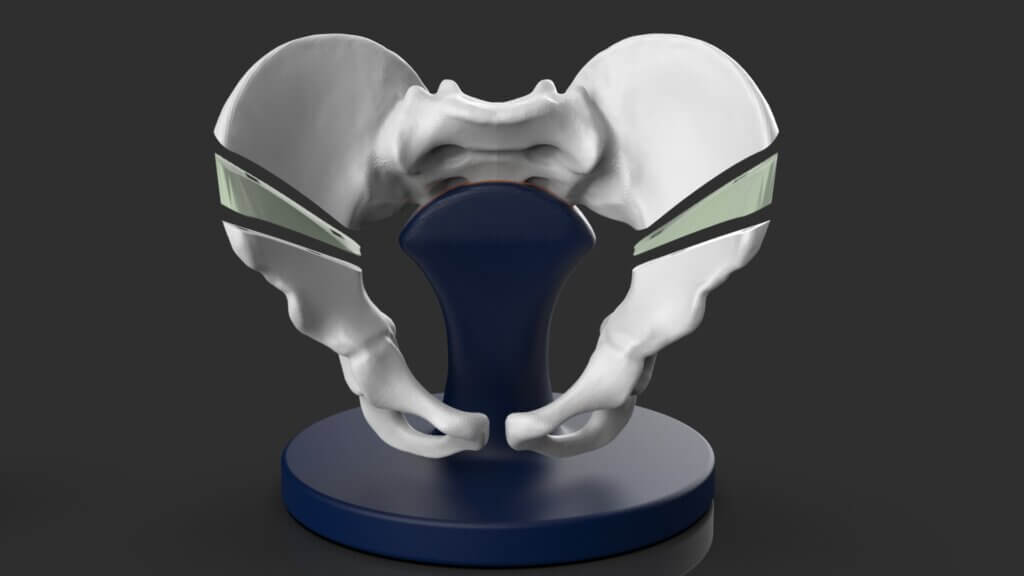
For the Advanced 3D Printing for Health Science Students elective I collaborated with Dr. Delgado and Dr. Swarup to create three models of three different approaches to iliac osteotomy on an infant pelvis model for the congenital condition of bladder exstrophy.
Q: Why did you decide to create it?
It was part of a project aiming to establish which of the three approaches is most beneficial for patients.
Q: What was your process like?
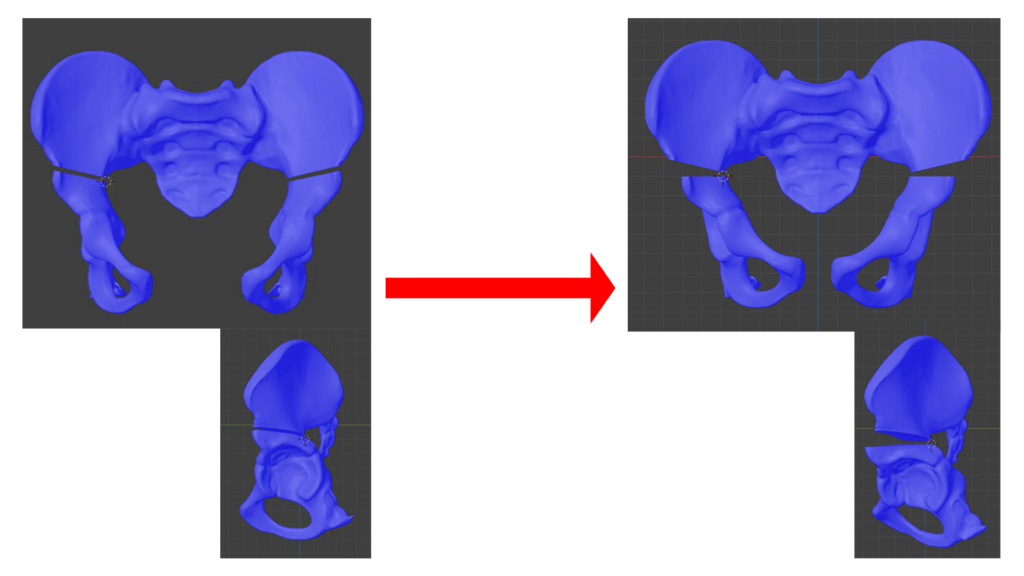
Working with Scott and Jenny from the Makers Lab, we used an Einscan 3D scanner to capture a SawBone infant pelvis as a base to model the three iliac osteotomy approaches. Test cuts were done manually with a saw on the copy of the model to give us an idea of what the wedges might look like.
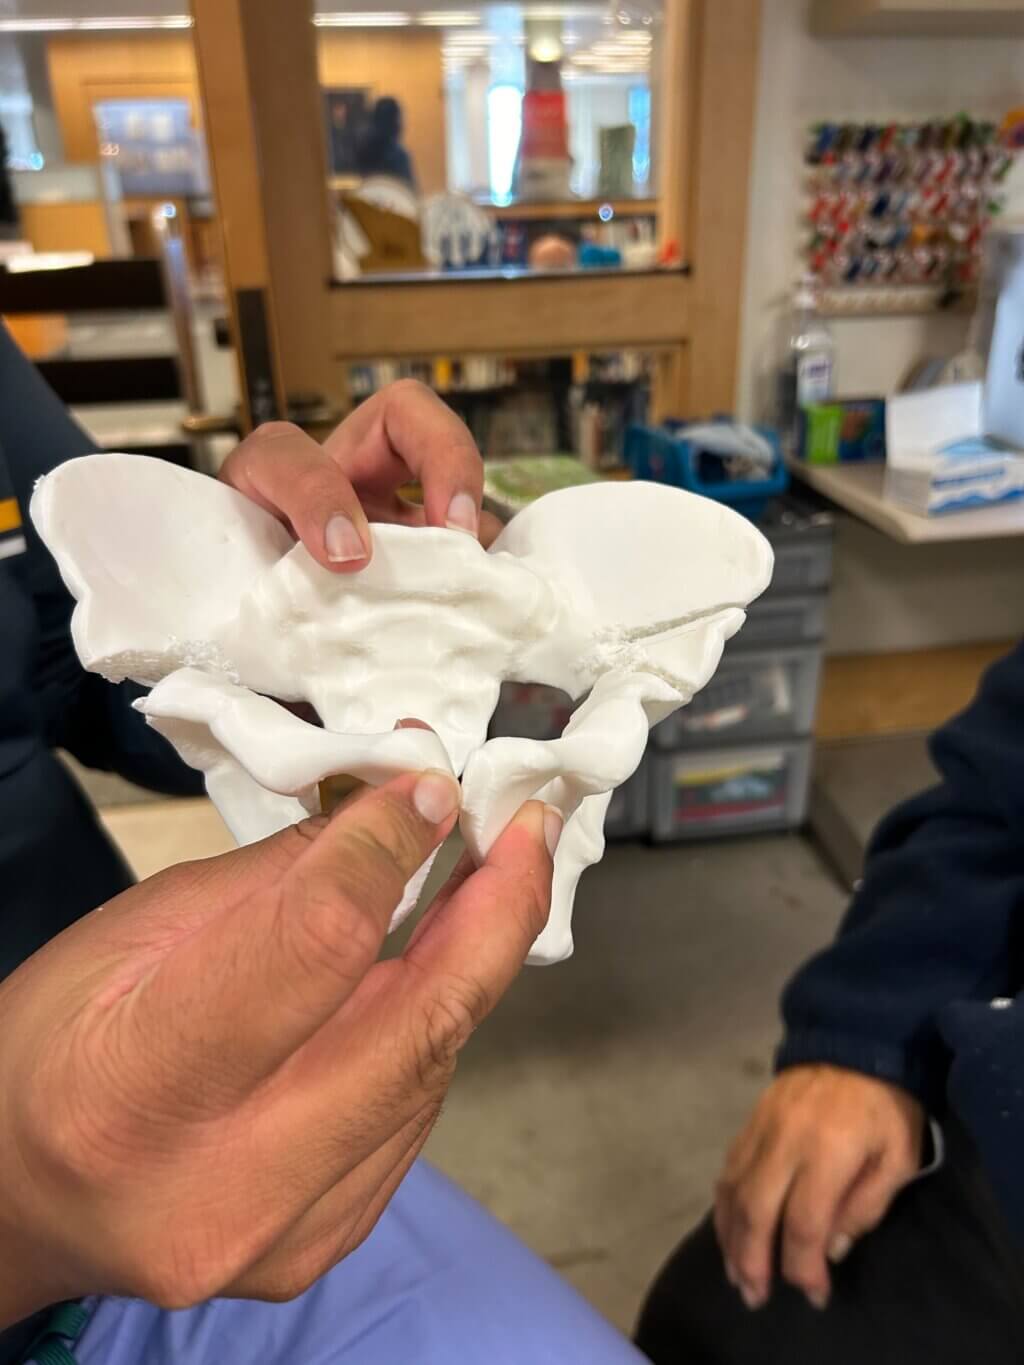
We then printed out these models with appropriately sized wedges to mimic the alterations made during surgery. We also worked with Michael Bunker, 3D+ Engineer at the Center for Advanced 3D+ Technologies to help us digitally measure volume differences.
Q: What was the most challenging part of the process?
Modeling the surgeries was complicated, but with Scott’s expert guidance, it ended up being a smooth process. We took advantage of Blender’s animation capabilities so we could record the precise movement from pre to post-cut, and thus be able to model appropriate wedges for each model.
Q: What was your favorite part of the process?
Seeing it all come together was fascinating and stepping back to view the animations demonstrating the surgeries from preoperative to postoperative was illuminating.
Q: How has this project contributed to your education?
I’ve learned so much about how 3D modeling and printing can be applied to medicine, surgeries and operations. I hope to be involved in similar projects in the future.
Q: What do you plan to create next?
Hopefully model some other surgeries using the skills I learned from this project and collaborate with the Makers Lab again soon.